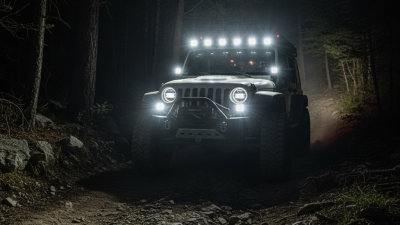
Picking out Off Road Chase Lights in 2026 isn't just about grabbing the brightest thing you see on the shelf. You gotta think about what actually makes sense for your ride — like, will it improve visibility without blinding other drivers or throwing off too much heat? Most experienced off-roaders start by considering the terrain first. Whether you're cruising dusty desert trails, weaving through wooded tracks, or doing night recoveries, different situations call for different beam patterns and mounting spots. A wide rear-facing beam can help the folks behind you keep track of your movements, while a tighter, focused beam might be better for open areas. Little details really do add up here.
Make sure to check the housing materials — is it water-resistant? Can it handle vibrations? How good are the connectors, and what’s the actual current draw? The spec sheet from the manufacturer is a good place to start, but it’s worth reading reviews and testing out the product over time. After all, what looks good on paper might not hold up after repeated washes, bouncing over rough roads, or temperature swings. Sometimes you’ll notice loose brackets or cracked lenses only after you’ve had the lights for a while, not right when you install them. Don’t take marketing claims at face value — dig a little deeper. Double-check that the harness includes the right fuses, relays, switches, and weatherproof connectors. When installing, route your wiring carefully, away from sharp edges, hot exhaust, and suspension parts to avoid problems down the line. The way you install them really can make or break how reliable your Chase Lights are.
Of course, no checklist can cover everything. A super bright light might look cool, but it could perform pretty poorly in dusty or rainy conditions. Some budget-friendly options pack a punch but use cheaper hardware that might not last. That’s why this guide looks at both the specs and what actually matters in the real world — like, how they perform on the trail. And hey, your driving style still makes a difference. Always be honest with yourself about what features you really need before dropping your cash. At the end of the day, reliability beats style every time.
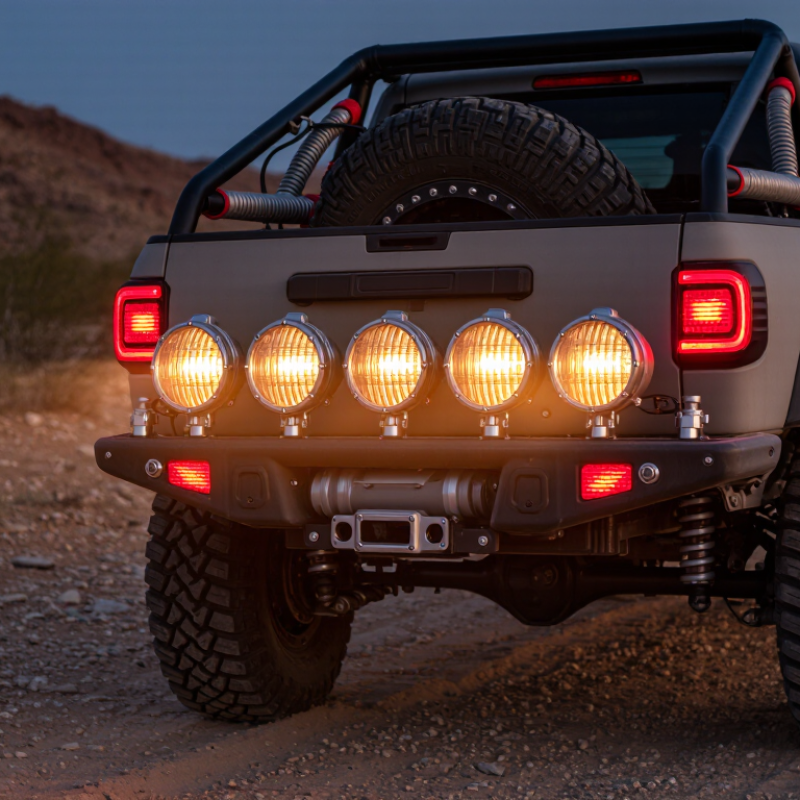
Off-road chase lights are auxiliary visibility lamps mounted at the rear of a vehicle. They commonly use amber or red LEDs to show the vehicle’s position in dust, rain, or low light. “Chase” refers to vehicles following the lead vehicle through difficult terrain. Their purpose is simple: improve recognition and reduce confusion on narrow trails. They are not a replacement for headlights, brake lamps, or turn signals. That distinction matters.
A reliable setup should provide a wide viewing angle, strong vibration resistance, and sealed housing against water and dust. Check the light’s ingress protection rating, wiring quality, mounting strength, and heat control. When comparing an OEM Off Road Chase Lights solution, inspect the beam pattern instead of trusting brightness claims. A focused lamp may look impressive but leave side angles poorly visible. A bright lamp is not automatically better.
Color choice and flash patterns must follow local vehicle regulations and trail requirements. Some areas restrict certain colors or warning functions. Confirm compatibility with the vehicle’s electrical system before installation. Loose connectors can fail after repeated jolts. It is easy to overlook cable routing near hot exhaust parts. I would also test the lights at dusk, from several distances, because workshop visibility can be misleading. Small flaws become obvious on a dusty trail.
Off-road chase lights are high-visibility rear lights designed to help vehicles identify your position in dust, darkness, rain, and low-visibility trail conditions. When choosing a light, compare its power consumption, visibility pattern, weather resistance, mounting position, and compatibility with your vehicle’s electrical system.
The chart estimates current draw for common light-power levels on a nominal 12-volt vehicle system. Current is calculated using I = P ÷ V: an 18-watt light draws approximately 1.5 amps, while a 36-watt light draws approximately 3 amps. Actual readings may vary with voltage, wiring, and driver efficiency, so select suitable fusing and wiring for the final installation.
Choosing the Best Off Road Chase Lights starts with your vehicle, not a product page. A compact SUV needs a lighter, narrower setup than a long-wheelbase truck. Measure roof width, rear visibility, and available mounting points first. Fit the vehicle. Not the trend.
Voltage matters. Most recreational vehicles use 12-volt systems, while some commercial platforms use 24 volts. Check the light’s operating range, current draw, and alternator capacity before installation. A simple load calculation prevents flickering during slow technical driving. SAE J575 testing covers vibration, moisture, dust, and temperature exposure for vehicle lighting. That standard offers useful guidance, but it does not guarantee every real-world result.
Match the beam to your terrain. A wide, diffused pattern suits dusty trails and close-following visibility. A tighter pattern may work better across open dunes. Choose sealed connectors and an enclosure rated for repeated water and dust exposure. SEMA’s 2023 Market Report valued the 2022 U.S. specialty-equipment market at $52.3 billion, showing how many owners modify vehicles differently. That variety makes universal advice unreliable. I would still leave room for adjustment. A perfectly centered Light Bar can look neat, yet glare may distract the driver behind you. Test the lights at dusk, then inspect them after vibration, mud, and one careless wash. Small mistakes appear quickly.
| Vehicle Type | Typical Electrical System | Recommended Light Format | Suggested Light Count | Minimum Weather Protection | Recommended Visibility Features | Mounting Location | Key Selection Reason |
|---|---|---|---|---|---|---|---|
| Compact SUV or Small Crossover | 12 V DC Typical charging voltage: approximately 13.5–14.8 V | Compact LED chase bar or two low-profile pods Approximate width: 250–500 mm | 1 bar or 2 pods | IP67 minimum | Amber rear-facing flash pattern, wide viewing angle, low current draw | Upper rear hatch, roof rack, or rear accessory carrier | Limited rear mounting space and lower available payload favor a compact, lightweight design. |
| Full-Size SUV | 12 V DC Typical charging voltage: approximately 13.5–14.8 V | Medium Led Bar or modular multi-light setup Approximate width: 500–900 mm | 1 bar or 3–5 pods | IP67 or IP68 | Amber or amber-red pattern, high lateral visibility, independent brake and turn-signal inputs | Roof rack, rear ladder, spare-tire carrier, or upper tailgate area | A wider rear profile benefits from a longer light source and improved side visibility. |
| Two-Door Short-Wheelbase 4x4 | 12 V DC Typical charging voltage: approximately 13.5–14.8 V | Short modular LED bar or compact pods Approximate width: 300–700 mm | 1 bar or 2–4 pods | IP67 minimum | Shock-resistant housing, adjustable flash rate, sealed connectors | Rear roll bar, roof rack, or spare-wheel mount | Short vehicles often operate on narrow trails, so compact dimensions and strong vibration resistance are important. |
| Four-Door 4x4 or Utility Pickup | 12 V DC Typical charging voltage: approximately 13.5–14.8 V | Medium or full-width LED chase bar Approximate width: 600–1,200 mm | 1 bar or 3–6 pods | IP68 preferred | High visibility from the rear and sides, brake-light integration, reverse-light separation | Roll bar, bed rack, rear cab rack, or tailgate mount | The larger rear structure allows a wider light arrangement without obstructing the license plate or cargo access. |
| Side-by-Side Utility Vehicle | 12 V DC Some models use 14 V nominal systems | Lightweight LED pods or narrow bar Approximate width: 200–600 mm | 2–4 pods or 1 narrow bar | IP67 minimum | Low power consumption, vibration resistance, dust sealing, compact connectors | Rear cage, whip-pole mount, or rear cargo rack | Small charging systems and severe vibration make low-current, lightweight products a practical match. |
| Competition or High-Speed Off-Road Truck | 12 V DC or 24 V DC depending on the vehicle build | Modular LED bar with reinforced mounts Approximate width: 600–1,500 mm | 1 bar or 4–8 pods | IP68 preferred | Fast response, high-impact housing, secure wiring, selectable flash patterns, wide-angle output | Rear cage, structural crossbar, or dedicated chase-light bracket | High speed and repeated impacts require stronger mounting, strain relief, and vibration resistance than recreational use. |
| Heavy-Duty 4x4 or Expedition Vehicle | 12 V DC or 24 V DC Verify system voltage before installation | Full-width bar or multiple sealed modules Approximate width: 900–1,800 mm | 1–2 bars or 5–10 pods | IP68 preferred | High thermal management, corrosion-resistant housing, redundant mounting, long-duty-cycle operation | Rear ladder, service body, roof rack, or upper rear frame | Long trips, heavy dust, water crossings, and extended operating time favor durable and serviceable components. |
| Trailer or Off-Road Support Rig | 12 V DC May be connected to a towing vehicle or independent auxiliary battery | Sealed LED pods or trailer-width bar Approximate width: 300–1,500 mm | 2–6 pods or 1 bar | IP67 minimum | Independent battery protection, trailer-rated wiring, high side visibility, red rear identification lighting | Rear frame, upper corners, or equipment rack | Trailer-mounted lights need protected wiring and should remain visible when cargo or equipment blocks the tow vehicle. |
How to Choose Off Road Chase Lights in 2026?
Choosing Chase Lights starts with the job, not the brightest specification. For dusty trails, amber is usually easier to recognize than white light. It creates a clear visual signal without flooding nearby drivers with glare. Red works well at the rear when you want a softer warning presence. White is useful for work areas, but it can disappear inside dust clouds. I have found that color temperature matters less than contrast and mounting height. Small details matter.
Beam pattern changes the result dramatically. A wide flood beam spreads light across a vehicle’s rear and nearby terrain. A narrow spot beam reaches farther but leaves dark gaps beside the vehicle. Many experienced trail users prefer a mixed pattern, combining broad coverage with a focused center. The IES TM-15-20 classification system helps describe these distributions more consistently than vague marketing terms.
Output numbers need careful reading. The U.S. Department of Energy’s 2023 Solid-State Lighting R&D Opportunities report discusses laboratory LED packages approaching 200 lumens per watt. Real fixtures produce less after optics, wiring, and heat losses. The IES LM-79 testing method measures complete luminaire performance, making its results more useful. I once selected lights by lumen claims alone. That was a mistake. Look for measured output, thermal design, sealed connectors, and a suitable color pattern for your terrain.
How to Choose Off Road Chase Lights in 2026?
How to Check Brightness, Visibility, and Weather Resistance
Choosing off-road chase lights in 2026 starts with usable visibility, not impressive advertising numbers. Brightness matters, but raw lumens can mislead when the beam spreads unevenly. Look for a wide, consistent pattern that remains visible through dust, rain, and changing terrain. At dusk, test the lights from several angles and distances. A bright center is not enough. Other drivers should recognize your vehicle without facing painful glare.
During night drives, I compare rear visibility at fifty, one hundred, and two hundred meters. I also check whether the light remains clear against dark trees and pale dust. Flash patterns should be noticeable, but they should not distract people behind you. I once focused too heavily on brightness and ignored mounting height. That was a mistake. A poorly positioned light can lose visibility when the vehicle climbs or dips.
Weather resistance deserves equal attention. An IP rating offers useful guidance, but installation quality still matters. Check sealed connectors, flexible cable jackets, and a housing with no obvious gaps. Water can enter through damaged insulation or loose fittings. After muddy trips, inspect the lens, wiring, and mounting bolts before driving again. Heat is another concern. A lamp may work well for ten minutes, then dim near a hot exhaust area. I still prefer controlled testing over assumptions, because real trails often expose weaknesses that workshop checks miss.
Choosing off-road chase lights in 2026 starts with mounting, not brightness. A light can be powerful yet poorly placed. For Amber Chase Lights, measure the rear bar, roof edge, or spare-tire carrier before ordering. Check clearance around hinges, antennas, and tailgates. Use corrosion-resistant brackets with a firm backing plate. Thin sheet metal may flex on rough tracks. I once trusted a universal clamp too quickly. It loosened after repeated vibration. That small mistake changed my mounting checklist.
Select a mount that matches the vehicle’s movement. Fixed brackets suit rigid body panels, while vibration-isolating mounts help near flexible carriers. Keep the light pattern visible from the intended rear angles. Avoid blocking plates, lamps, or other required equipment.
Mounting height also affects mud buildup and cleaning access. Leave enough room to remove the lens without dismantling the whole assembly. This is easy to overlook.
Tips: Run a mock installation with cardboard first. Mark bolt holes, cable paths, and connector positions. Use sealed connectors and abrasion-resistant loom near sharp edges. Add a properly rated fuse close to the power source. Ground to clean metal, not painted surfaces. Keep power and signal wires separated where practical. Test every function with the engine running, then inspect for heat, flicker, and cable tension. A wiring plan that looks obvious can still hide a weak ground. Recheck all fasteners after the first drive.
Legal and safety requirements should guide your choice before brightness or appearance. Rules differ by country, state, and even road type. A light approved for private trails may not be legal on public roads. Check local regulations for permitted colors, flashing patterns, mounting height, and rear visibility. Amber is commonly used for warning applications, but it is not automatically lawful everywhere.
Look for documented testing, not vague claims on packaging. Relevant requirements may include photometric performance, electromagnetic compatibility, and water resistance. Standards such as SAE or UNECE rules can provide useful reference points, but they may not apply equally in every region. Ask the seller for test reports and approval details. A genuine compliance document should identify the product, testing method, and issuing laboratory.
Inspect the installation as carefully as the lamp itself. The beam should not blind following drivers or reflect harshly through dust. Use a fused circuit, sealed connectors, and wiring protected from stones and exhaust heat. The lamp must not hide the license plate, brake lamps, or turn signals. I prefer a guarded switch with a clear status indicator, especially during night recovery work. Brighter is not always safer. I once assumed a wide beam was better, yet it created glare in airborne dust. That mistake changed my selection process. Consider visibility, control, durability, and local approval together.
The LT-103FT/FP yellow round LED combo beam fog lights are designed for drivers who need improved visibility in fog, rain, dust, and other challenging conditions. Their yellow light output can help create a sharper contrast against atmospheric moisture, while the combination beam provides a practical balance between forward illumination and wider roadside coverage. With a compact round housing and durable construction, these lights are suitable for many pickup trucks, off-road vehicles, and SUVs.
Built in an advanced factory in China, the LT-103FT/FP features efficient LED technology for bright performance, low power consumption, and dependable long-term operation. The sturdy housing helps protect internal components from vibration and changing weather conditions, making the lights a useful upgrade for daily driving, outdoor travel, and demanding road environments. Their clean design can complement a range of vehicle styles without overwhelming the original appearance.
When choosing yellow LED combo beam fog lights, buyers should check mounting space, wiring requirements, operating voltage, and compatibility with the vehicle’s bumper or auxiliary-light brackets. It is also important to confirm beam alignment after installation so the light pattern improves visibility without distracting other road users. As a reliable factory supplier, we provide the LT-103FT/FP with a focus on consistent quality, practical functionality, and responsive support for different customer applications.
They help following vehicles recognize your position in dust, rain, darkness, and narrow trails.
Mount them where rearward visibility remains clear, such as a rear bar, roof edge, or spare-tire carrier.
Inspect the viewing angle, not brightness alone.
Use corrosion-resistant brackets with a strong backing plate.
Measure the mounting area carefully.
Use sealed connectors and abrasion-resistant loom near sharp edges.
Add a properly rated fuse close to the power source.
Test every function with the engine running.
No.
Choosing the right Off Road Chase Lights in 2026 starts with understanding their purpose: improving vehicle visibility, signaling your position, and helping others follow safely during off-road travel. Consider your vehicle’s size, layout, and electrical capacity before selecting a light setup. The best choice should fit your driving environment, whether you mainly travel through open desert, wooded trails, muddy terrain, or low-light conditions.
Compare light types, colors, beam patterns, brightness, and viewing angles to achieve clear visibility without creating distracting glare. Durability is equally important, so look for weather-resistant construction, secure mounting hardware, protected wiring, and connectors suited to dust, water, vibration, and temperature changes. Choose a mounting position that remains visible while avoiding interference with doors, roof equipment, antennas, or cargo. Finally, use properly rated fuses, switches, and wiring, and check local vehicle equipment rules, lighting limits, and safety standards before installation. A well-planned system should be bright, reliable, easy to maintain, and appropriate for responsible off-road use.